You’ve got questions about Silicone Roof Coatings, such as:
- What is a silicone roof coating?
- How much does it cost per square foot?
- How long will it last?
- What benefits do silicone roof coatings provide?
- What problems do silicone roof coatings have?
- What kind of commercial roofs are eligible for a silicone roof coating?
- How are they installed from start to finish?
- Silicone roof coatings vs acrylic roof coatings
- Case studies of silicone roof coating systems
Please choose a chapter below to begin.
[clicking on any chapter will take you directly to that section]Chapter 1: What Is a Silicone Roof Coating?
Chapter 2: How Much Does a Silicone Roof Coating Installation Cost?
Chapter 3: How Long Will Silicone Roof Coatings Last?
Chapter 4: 5 Benefits Silicone Roof Coatings Provide?
Chapter 5: What Problems Do Silicone Roof Coatings Have?
Chapter 6: What Kind of Commercial Roofs Are Eligible for a Silicone Roof Coating?
Chapter 7: How Are Silicone Roof Coatings Installed on a Commercial Roof?
Chapter 8: Silicone Roof Coatings vs Acrylic Roof Coatings
Chapter 9: Case Studies/Examples of Silicone Roof Coated Roofs
Chapter 1: What Is a Silicone Roof Coating?
A silicone roof coating system is a versatile and self-flashing membrane material perfect for commercial roof renewal.
After the existing roof is cleaned and repaired, the silicone coating is sprayed or rolled on, sealing any imperfections and adding a waterproof layer to your commercial roof.
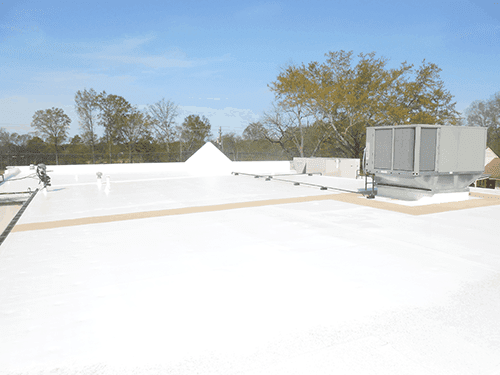
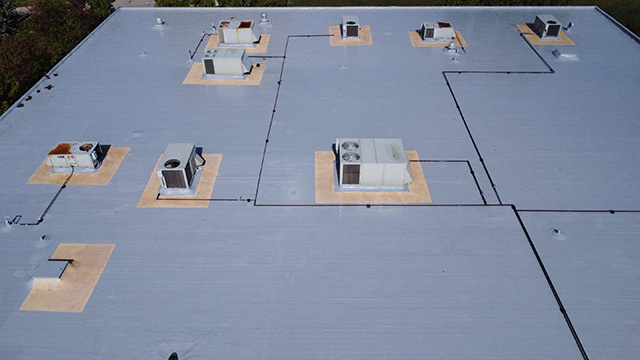
Whether your roof is flat or pitched, a silicone roof coating system can handle any type of roof, including those with skylights, vents, HVAC units, and drainage systems.
The number one benefit of installing a silicone roof coating is that it’s more cost-effective than a complete roof tear-off, it saves on your energy bill by adding reflectivity, and it’s seamless, which does not allow water an opportunity to enter your building.
Chapter 2: How Much Does a Silicone Roof Coating Installation Cost?
An average 20,000 sq. foot commercial roof usually costs between $3 and $7 per square foot to install a typical silicone roof coating system.
Here are some factors that influence cost:
- Length of warranty – a 10-year warranty requires a 20-mil thickness. a 20-year warranty requires a 30-mil thickness. More material = higher cost.
- Roof preparation – no roofing system should be installed over wet insulation. These areas need to be identified, removed, and replaced before the coating system can be installed. A 100,000 sq. ft. roof that’s 20% saturated versus one that’s 1% saturated is a huge cost difference.
There are other cost drivers, such as: distance from the contractor and manufacturer pricing, which you can learn more about in this article:
Article: What Factors Influence the Cost of a Silicone Roof Coating System?
Chapter 3: How Long Will Silicone Roof Coatings Last?
Silicone roof coatings can last between 10 and 20 years.
This all depends on the coating thickness that’s applied to your roof:
- A 10-year warranty requires 20 mils of coating.
- A 20-year warranty requires 30 mils of coating.
Chapter 4: Benefits Silicone Roof Coatings Provide?
Cost Savings
Cost savings is one of the top benefits of a Silicone Roof Coating System. No roof removal is required as long as the existing roof substrate is dry and stable. In this case, we make preventative repairs to the current system and install a brand-new silicone coating that acts like a waterproof roof system over the existing substrate.
The usual cost savings is 3-4x cheaper than a complete roof replacement.
Considered Maintenance
A silicone roof coating system provides a new waterproofing membrane over the existing roof membrane, which is considered a maintenance application in lieu of roof replacement. This means that the coating application can be done many times without adding additional roof systems, which would eventually require removal per building codes.
Per building codes, you can only have 2 roofing systems installed. Adding silicone coatings to restore your roof is not considered a roofing system.
Extended Life Roof
If your roof is in relatively good condition, you can extend the life of your commercial roof by protecting it from the elements. Since the silicone is applied as a liquid, it fills in any seams, cracks, or other vulnerable areas of your roof.
Reduced Energy Expenses
Silicone roof coatings are often referred to as “cool roofs” due to their ability to keep facilities cool. The bright white color reflects UV rays, saving buildings up to 35% in energy costs from not needing as much air conditioning to keep the facilities cool. Utilizing a bright white coating application reduces energy costs as part of the energy star cool roof solution.
Short Project Duration
One of the biggest issues with having work done on your facility is the interruptions to the daily functions of your building. A silicone coating project can cut the project duration by up to 30%
Chapter 5: What Problems Do Silicone Roof Coatings Have?
Here are 4 problems that silicone roof coatings have:
1. Slippery
When silicone roof coating systems get wet, they can be very slippery. A roofing contractor will add sand into the wet coating during application for high foot traffic, such as near HVAC units.
The sand provides a more stable walking area and some strength to handle the abuse when HVAC panels and tools get placed down.
2. Eligibility
For an existing roof system to be eligible for a coating system installation, the roof needs to be in better condition than most roofs at the end of their serviceable life. Some signs of a roof in good condition include:
- The seams of the existing membrane are relatively intact
- The field of the roof has been properly maintained over its life
- Less than 25% of the underlined substrate and insulation is wet (It is still cost-effective to do spot replacement of small saturated areas rather than a complete replacement.)
Typically, 20-30% of roofs will be ineligible due to neglect of the roof or the lack of a previous maintenance program.
3. Dingy
When a coating system is first installed, it’s a white/gray, shiny product of pure elegance.
Like your new car after a few years, the shine doesn’t last.
Some outside elements, such as leaves, dirt, and algae, tend to stick to it.
Having outside elements on your roof won’t affect the performance of the roofing solution, but it’s just a foreseen problem in having something so shiny white.
4. Built-up roofs
Built-up roofs tend to have uneven gravel or stones on the outermost layer of the roof. When spraying down silicone, getting a smooth surface over this rocky area is hard.
Some roofing contractors will not install a silicone roof coating system over BUR’s.
Chapter 6: What Kind of Commercial Roofs Are Eligible for a Silicone Roof Coating?
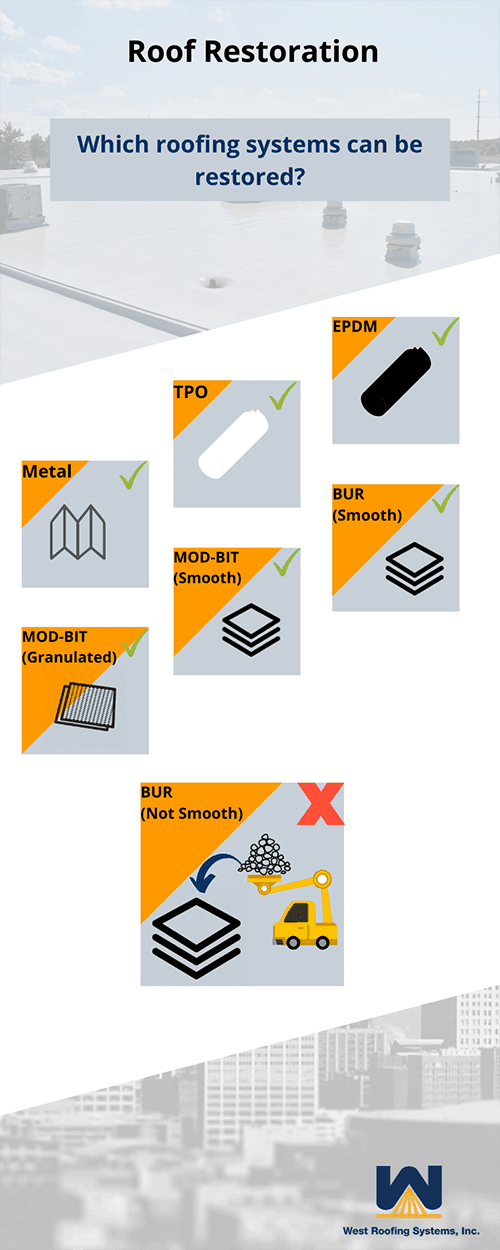
Single-Ply Roofing Systems (TPO and EPDM)
Single-ply roofing systems are perfect candidates to be restored.
Why?
Restoring your single-ply roof is a simple process:
Step 1 – Perform an infrared survey to check for saturated areas
Step 2 – Removing and replacing those saturated areas
Step 3 – Clean the roof with a power washer
Step 4 – Reinforce all seams with polyester-reinforced mesh or self-adhering, reinforcing tape
Step 5 – Spray or roll silicone (depending on the wind and overspray potential) and you’re done.
Some roofs have large amounts of foot traffic, so sand can be embedded into the silicone to not only strengthen the walkway but also mark the walkway clearly.
Metal Roofing Systems
Metal roofing systems need to be treated before silicone coating can restore the roof. The reason is to make sure the silicone adheres properly.
Here are the steps for restoring a metal roof:
Step 1: Power wash the entire roof (use a primer if there’s rust)
Rust will continue to oxidize your metal roof if not treated.
Step 2: Reinforce all your seams (horizontal and vertical) in one of two ways:
- With polyester reinforced mesh into a liquid top coating
- With self-adhering, reinforcing tape
It’s important to pay special attention to seams because these areas are most prone to leaks. When you have two metal panels coming together, if they aren’t adhered perfectly, it can create an opportunity for water to enter the building.
Step 3: Address fastener heads
Over time, fastener heads can wear out and degrade, or they can be installed slanted or with too much or too little pressure. Either way, with fasteners creating a hole in the metal, if they’re worn out or installed incorrectly, it’s an easy opening for water.
A roofing contractor will use mastic tape over the fastener or use a self-leveling material that goes over them (which is similar to caulking that oozes over the top of the fastener).
Step 4: Apply silicone coating
Spray or roll silicone coating over your metal roof and it’ll be restored.
Modified Bitumen Roofing Systems
Modified Bitumen roofing systems come in two types, smooth-surfaced and granulated. Both types are eligible to be restored with a silicone coating.
However, there are some differences.
For one, the cleaning process is slower on a granulated surface than on a smooth surface. This is due to the granule’s ability to hold dirt better.
Another major difference in these systems is that a bleed blocker is normally used to prevent the black membrane “bleeding” into the new, white coating.
Built-up Roofing Systems
Here’s where it gets interesting.
Built-up Roofs (BUR for short), come in two types, smooth and not smooth.
BUR’s have alternating layers of tar, felt, tar, felt, etc. and the only difference between the two is the top layer.
On a smooth BUR, tar is the final layer. On an unsmooth BUR, embedded rock or loose gravel is inserted into the final layer of tar, creating a “rocky” surface.
On a smooth BUR, silicone can be applied to restore the roof after cleaning.
With the embedded rocks, even if you remove and clean the roof, there’s so much embedment into the tar that it would be ½ the cost to just spray foam the roof.
If you did go the silicone restoration route, you would need double the coating to either fill all the embedment’s, or to level the roof surface over the stones. Either way, restoring an un-smooth BUR is not a cost-effective option. A more cost-effective option would be a spray foam roof.
Chapter 7: How Are Silicone Roof Coatings Installed on a Commercial Roof?
The process of installing a silicone restoration membrane is relatively straightforward:
1. Inspection and Repairs
First, an infrared inspection should be performed to see if any saturated insulation areas are under the membrane. After those saturated areas have been removed and replaced, the entire roof surface is power-washed to remove any contaminants.
After the roof membrane is washed, an adhesion test should be performed to determine whether a primer is required for the silicone membrane to adhere to the roof membrane surface. Most roof membranes will require some primer but it is best to verify with an adhesion test.
2. Seam Reinforcement
After the primer has been installed, the seams of the membrane are then reinforced. There are two common types of seam reinforcement.
- Installing a polyester reinforced mesh into a liquid top coating and then an additional silicone coating after the topcoat has cured.
- To reinforce the seams, flashings, and penetrations with a self-adhering, reinforcing tape that would then receive a liquid topcoat.
3. Silicone Application
Once all of the miscellaneous repairs have been performed to the existing roof system, the silicone membrane is simply sprayed on or roller applied over the entire surface of the roof. Different manufacturers require different coating thicknesses. In some cases, only a single layer is required, which saves additional dollars in reduced labor costs.
4. Warranty
After the silicone coating membrane has been completed, a final inspection will be performed by a third party or the manufacturer’s representative to verify that all the necessary repairs were performed properly and that the silicone is applied accurately. When the repairs and silicone membrane coating are approved, the final warranty is issued.
Chapter 8: Silicone Roof Coatings vs Acrylic Roof Coatings
Let’s compare the two most popular commercial roof coatings, silicone, and acrylic.
What are the pros of each?
Silicone
- highly-reflective
- resistant to UV rays
- doesn’t get hard or brittle
- no erosion or wash-off
Acrylic
- highly-reflective
- resistant to UV rays
- cost-effective (could be 30-50% less than silicone)
- holds up to a variety of climates
What are the cons of each?
Silicone
- tear easily
- prone to holding dirt
- over time you may lose reflective properties
Acrylic
- should be applied at 50 degrees F or higher
- lose thickness over time
- dew will wash it away
What are the costs of each?
Silicone
- lower cost per mil
- can be applied in one coat
Acrylic
- higher cost per mil
- needs applied in multiple coats
Chapter 9: Case Studies/Examples of Silicone Roof Coated Roofs
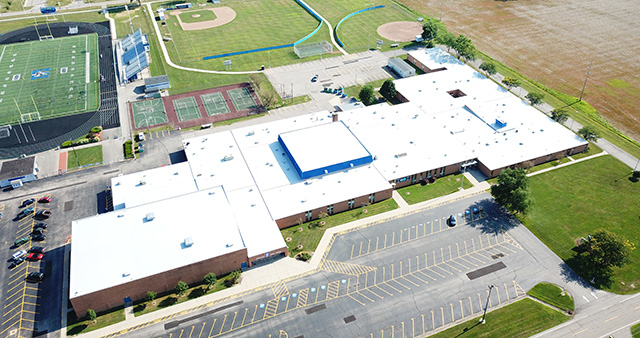
Learn how a silicone roof coating system gets Midview High School to critical year 11. Click here for the complete scope of work and details.
Learn how a “hybrid system” of spray foam and coatings made sense for this medical device manufacturer. Click here for the complete scope of work and details.
Are You Ready to Talk About Your Roof?
The goal of this page is to give you a complete guide on everything about silicone roof coatings.
We just wanted to help you by giving you all the information available in one area in hopes that you can use this to make the best possible decision for your building.
At West Roofing Systems, we’ve been installing silicone restoration coating systems for over 40 years and have helped thousands of buildings stay leak-free while avoiding a costly tear-off.
Thank you for reading our extensive article! If you want to hear from us, please request a quote, and we’ll contact you ASAP.

